Hey all,
This is a guide on how to setup your first Linux VPS and get Gunbot running on it. I spent over four hours trying to get all setup and running on my first Linux VPS. I wanted to create a guide that would help others avoid that issue. This guide will follow every. single. step. of me setting up a demo Ubuntu 16.04 AWS VPS on my Mac. The vast majority of the steps should be the same for Windows using PuTTY.
PM me if you have questions or issues and I'd be happy to help.
What this guide will do:* Get you from having no Linux VPS to up and running with Gunbot
* Give you the most Windows-like experience I’ve been able to create
* Show you how to set up a desktop GUI
* Include all steps needed to get it running
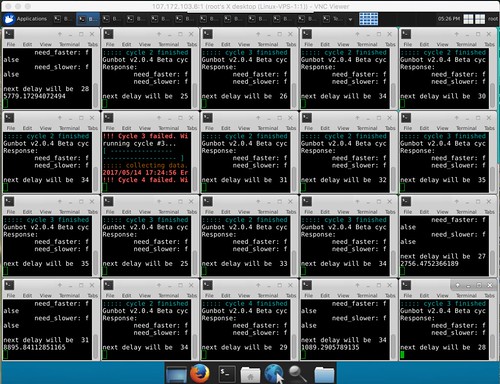
* Provide step-by-step instructions to on how to get your Linux VPS's Gunbot instances looking like this:
 What this guide will not do:
* Use only the console. I like having a GUI to quickly monitor my bots
* Install complicated software for viewing Gunbot sessions
* Have missing steps or leave things up to interpretation
Table of Contents:1. Backstory
2. Picking a VPS provider
2.1. Security!!
3. Accessing your VPS for the first time
4. Setting up VNC so you have a GUI
5. Connecting to VNC and Installing Gunbot
6. Getting Gunbot Running
7. Easy start script and window tiling
8. FAQ
And then a picture of the final result!
1. BackstorySome quick backstory about me before we get started. I’ve been a Windows guy for most of my life, never really used Linux outside of live-booting some distributions to mess around. I’ve noticed a lot of the guides here seem way more technical, or better for people who are already familiar with Linux.
My goal for this guide was to create a step-by-step walkthrough for setting up a Linux VPS with no prior knowledge and then setting up and running Gunbot.
2. Picking a VPS (Virtual Private Server) providerThere are a lot of VPS providers out there, so picking one can be confusing. A decent Linux VPS with 2 cores, 2gb of RAM, will run around $10-$15 per month. Windows VPSs can cost $5 to $15 more (because of licensing fees), which is why many people opt for using Linux. It may seem like a lot, but you will more than make up for it with the money you make from running Gunbot 24/7.
If this is your first time on Linux, I would recommend starting with the free-tier of AWS and getting familiar with the steps before shelling out cash for a better VPS.
Some common VPS providers: (no referral links)
Turnkey InternetVultrDigital OceanAmazon Web Services - Free 1gb/1core VPS for 1 year.
Contabo (Purchased in Euros)
Be sure to look for coupons before locking in a provider. There can be some coupons found that give recurring % discounts. TurnkeyInternet has one at the time of this writing.
For this guide, we’ll be using an AWS (Amazon Web Services) free-tier VPS. My actual VPS are running Gunbot and I don’t want to have to reset everything. The steps are less-complicated for other non-AWS VPS providers, AWS has a lot of additional complexities.
Once you pick the provider and the plan, the next step is to sign up. For the purposes of this guide, pick Ubuntu 16.04 as the Linux distribution for your new VPS.
Be sure to document any passwords you use, or are given.2.1. Password Security Disclaimer!Remember to pick a strong password,
especially for SSHing in. Your computer's IP will be broadcast to the entire internet. There are people out there who run scripts to scan ranges of IPs and look for open ports. Once they find an open port (like your SSH port 22), they can attempt to brute force your password, change it, and take control of your VPS. This is very rare and can be reset with your VPS provider, but still not good.
Based on what I've read,
strongest passwords are over 21 characters of random uppercase letters, lowercase letters, numbers, and symbols. I don't believe SSH passwords can use symbols (I could be wrong). Use a password manager or generator to create random passwords to use. Passwords with words and sentences are much easier to crack than random ones.
After the VPS is spun up, you should get an email (or a page) with some information including the username, password, and server's IP address. You will need these to connect.
2.5 Extra steps for AWS. Most other providers will setup your VPS with a “Root Password” or “Service Password” instead of the keyfile AWS uses.
1. After setting up your AWS account, go to your EC2 dashboard and click “Instances” in the navigation bar on the left.
=
2. Change your region to “N. California”

3. Click "Launch Instance"

4. Select "Ubuntu Server 16.04"

5. Click "Review and Launch" then "Launch" to get the server booted up.
6. Download the keypair (.pem) file. You need this to log in!
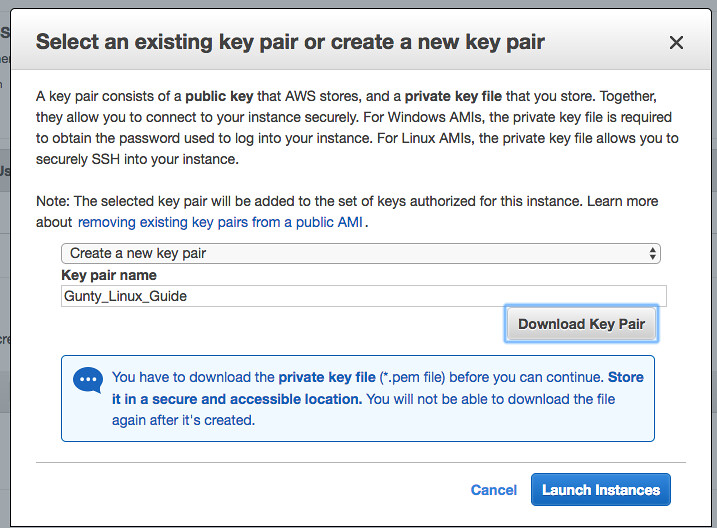
7. Click "Launch Instances" to create your VPS.
8. You will be taken to a page with a message saying "Your instance is being created" with a link to view it. Click that link.

9. You can now see your new AWS VPS instance!

Lastly, we'll need to change the security group to allow all traffic, not just SSH. This is so we can connect to it without using only the command line. AWS is the only VPS provider I've seen that restricts traffic automatically.
1. Select your instance, and under Description, click the security group for your instance. In this example, it is "launch-wizard-8"
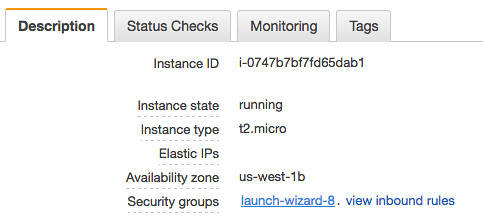
2. Scroll down, click "Inbound Rules"

3. Click "Edit"
4. Change the type from "SSH" to "All traffic" in the dropdown and click "Save"

Now we can finally access the server!
3. Accessing your VPS for the first timeOnce you purchase a VPS, you’ll be given a bunch of information about the new server. As mentioned above, be sure to save all IPs, usernames, and passwords.
Now we want to connect to our new instance. If using AWS, click the "Instances" link in the navigation bar on the left. Other VPS service providers have a management/services/details area where you can go to get the same information.
To connect to your instance:
1. Select your new instance and click "Connect"
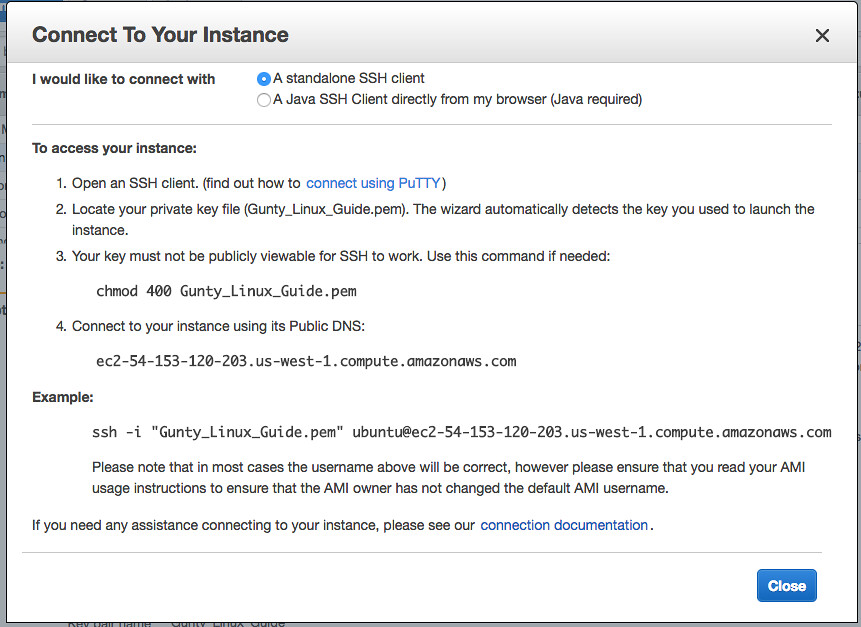
2. Amazon provides a nice string that you can just paste in to the terminal (Mac). PuTTY is a little more complex, but thankfully it's much easier with non-AWS VPS providers. This is unique to each instance, mine won't work.
3. For MAC users, open up the terminal (Command + Space, type in Terminal)
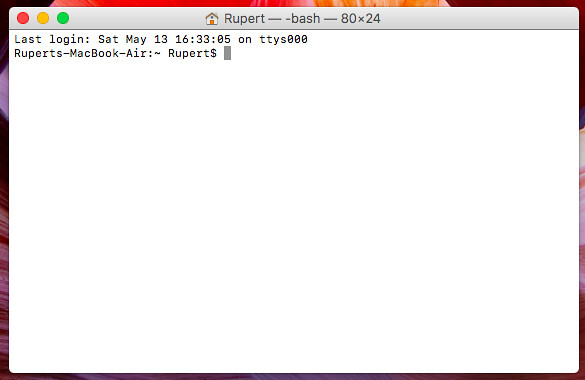
4. Next, you need to change the directory to wherever you saved your .pem file. I'm lazy and left it in my downloads folder. To do this, type the following command: cd /users/Rupert/downloads since Rupert is the name of my account on this PC.
5. Change the permissions of your keyfile by typing "chmod 400 pem_filename.pem" into the terminal
chmod 400 pem_filename.pem6. Copy and paste that nice string AWS provided you (the whole thing) and hit enter. For example, mine is:
ssh -i "Gunty_Linux_Guide.pem" ubuntu@ec2-54-153-120-203.us-west-1.compute.amazonaws.com7. You will be prompted to trust the host, type "yes".
8. You should be in! You'll know because your console should change from your computer name/user to something like
ubuntu@ip-172-31-1-48:~$
All codes in one window:
 Non-AWS users:
 Connect using the instructions given by the VPS provider. As an example for Mac, the only command I need to access my main VPS is
ssh username@ipMore information on accessing your VPS with AWS:
AWS Connection Guide4. Initial Setup (Including VNC so you have a GUI)The next step is to get VNC and a desktop installed so we can access everything the way we're used to. Without this step, you'd need to do
everything through the terminal like we have been. I don't know about you, but that's not something I'm interested in.
First thing's first, you'll need to make sure your VPS is up-to-date.
Run the following commands to get your new VPS totally up-to-date:
sudo apt updatesudo apt upgrade (Enter Y when prompted)
You may be asked about updating menu.lst. Choose "install the package maintainer's version", but it shouldn't matter too much.
After you've done that, it's time to install a desktop and TightVNCServer. To do that, enter:
sudo apt install xfce4 xfce4-goodies tightvncserver (Again, enter Y when prompted)
This will take a minute or two to complete.
After that completes, time to install a few more quality-of-life programsInstall the following programs. Some VPSs may come with them already installed.
sudo apt install nano firefox x-tile htopOnce that's complete, it's time to setup a vncserverType in the command
vncserverYou will be asked to enter a password. Enter an
eight character password, then re-enter it.
Save this password. This is how you will get into your machine's desktop. We will need it in the next section.I usually use random letters and numbers. I will use "testpass" as my very insecure password for this tutorial.
I strongly recommend you use an 8 character password with random uppercase letters, lowercase letters, and numbers.It will then ask you if you want to enter a view-only password. I usually say no.
You now have a VNC server running. Now kill it, we need to edit the config file. Type:
vncserver -kill :1Time to edit the vncserver config!First, we're going to backup the xstartup file for vncserver. That way we always have something to fall back on in case we mess up.
mv ~/.vnc/xstartup ~/.vnc/xstartup.bakNow, we'll remake xstartup to run with the xfce4 desktop we installed earlier:
Enter the following line to open up the nano text editor
nano ~/.vnc/xstartupNote: It will say it's a new file since we renamed the old one. That's fine.
Enter the following in the new xstartup file:
#!/bin/bash
xrdb $HOME/.Xresources
startxfce4 &
This tells the VNC Server to launch the xfce4 desktop when we connect to the computer.
Press control + o (followed by enter) to save, and control + x to exit out of nano text editor.
Next, we need to make our new file executable. To do this, type:
sudo chmod +x ~/.vnc/xstartupFinally start vncserver again by entering:vncserver -localhost :1This will open the port only to your local machine, the open port won't be visible to the internet as a whole. This will protect you from having those bad men (and women) I talked about in Section 2.1 from trying to log into your VPS via VNC. VNC has
some built-in protections for this, but you'll basically need to restart the machine in order to get back in the action. It's safest to use this method.
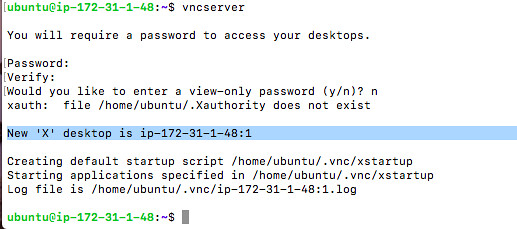 You will need to repeat this step every time you restart your machine, which hopefully won't be too often
Whewh. After all that, you should have VNC up and running on this machine. We're close to being able to access the desktop, just a few more steps.
Now, let's install some Gunbot pre-requisites!First, use curl to get the most up-to-date version of node.js. Shout out to J-Rod for this code.
curl -sL https://deb.nodesource.com/setup_7.x | sudo -E bash -curl should be installed, if it's not, type
sudo apt install curl and rerun the above command.
To install nodejs, run:
sudo apt install nodejsTo make sure the version is correct, enter
nodejs --version At the time of writing, my version is 7.10.0.
That's it! Now we're ready to hop in to the GUI and we can leave the commandline behind (for the most part)
5. Connecting to VNC and Installing GunbotGet ready for primetime! Now we should be able to connect to our VPS using VNC, get a desktop on a Linux machine much similar to RDP on Windows, and start running Gunbot.
The last thing before connecting to your VPS is getting a VNC viewerPersonally, I use RealVNC Viewer, a free piece of software available on almost every OS there is. It can be downloaded from
their website.
Once you've installed RealVNC Viewer, open it up and let's connect to our new server!
1. To connect, we'll need to know the Public IPv4 address and the password we setup vncserver with earlier. As you can see from the picture on, the Public IPv4 address is on the AWS Instance details page. All other VPS providers should have the IP on the server's information page as well. This is what you used to SSH in the sections above. Mine is: 54.153.120.203
 2. Mirroring the local :5901 port to your desktop computer
We want to connect to our VNC server session on the Linux VPS at port 5901. The reason for this is vncserver starts at:1 by default with new instances. VNC's default ports start at 5901 and go up from there. That's what the ":1" signifies when we started our server in the last section.
Output from earlier:
ubuntu@ip-172-31-1-48:~$ vncserver -localhost :1
New 'X' desktop is ip-172-31-1-48:1
If you remember, using -localhost means it's only running locally on the VPS. How can we connect to it?
Connecting from a Mac is pretty easy! It's very similar to connecting to the machine through SSH (like we've been doing up until this point). You'll need to start a new terminal session and
ssh -L 5901:localhost:5901 root@54.153.120.203Type in your SSH password (
not your VNC password), hit enter. Once you're logged in you're ready to move on to the next step!
Unfortunately, it's a little more complicated to do this on a Windows machine with PuTTY. Thankfully, there are some good guides for SSH Tunneling into VNC using PuTTY. One of them
can be found here.
For more information on why this is required, check out
this article on StackExchange.
3. Now, open VNC Viewer and start plugging in the information. Image: This shows me using a less-secure method that I don't recommend, but hopefully the visuals help. Up top is my VNC Viewer, and the address I'm trying to access. Below is the port info from when I ran vncserver in the SSH session.
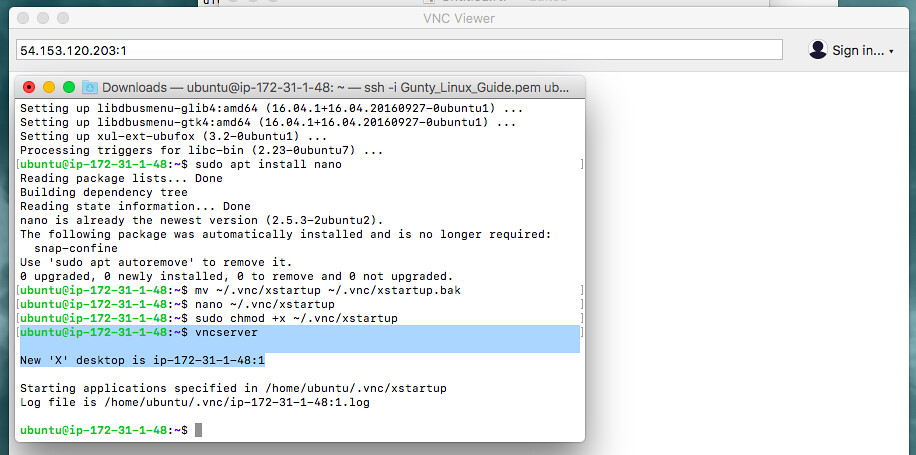
We want to open up VNC Viewer and enter the localhost:5901. For this test server, that would be
localhost:5901After that's entered, press enter.
You may have a message pop-up telling you that the connection is unencrypted. That is fine, click continue. Make sure you
always access this machine from a safe location, or people could watch what you do on your VPS.
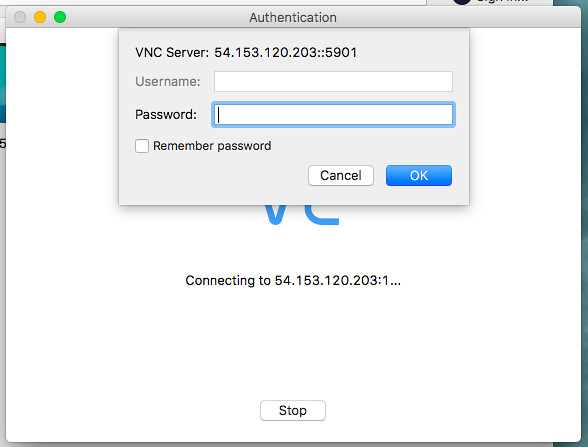
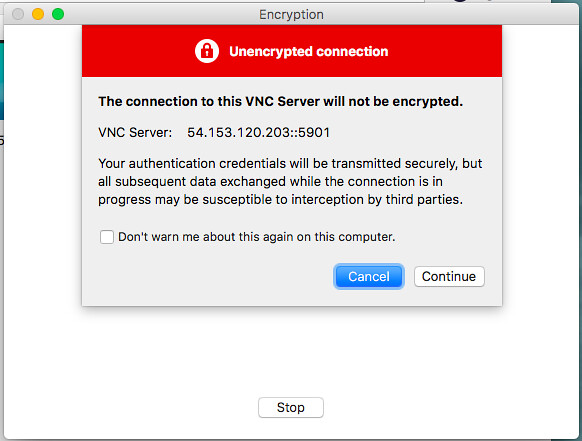 4. It will now ask you to enter a password. Enter the password you set earlier. The one I set is "testpass", so that's what I'll use. You can have it remember your password if you don't want to do this again.
5. You should now be connected to your VPSs desktop!
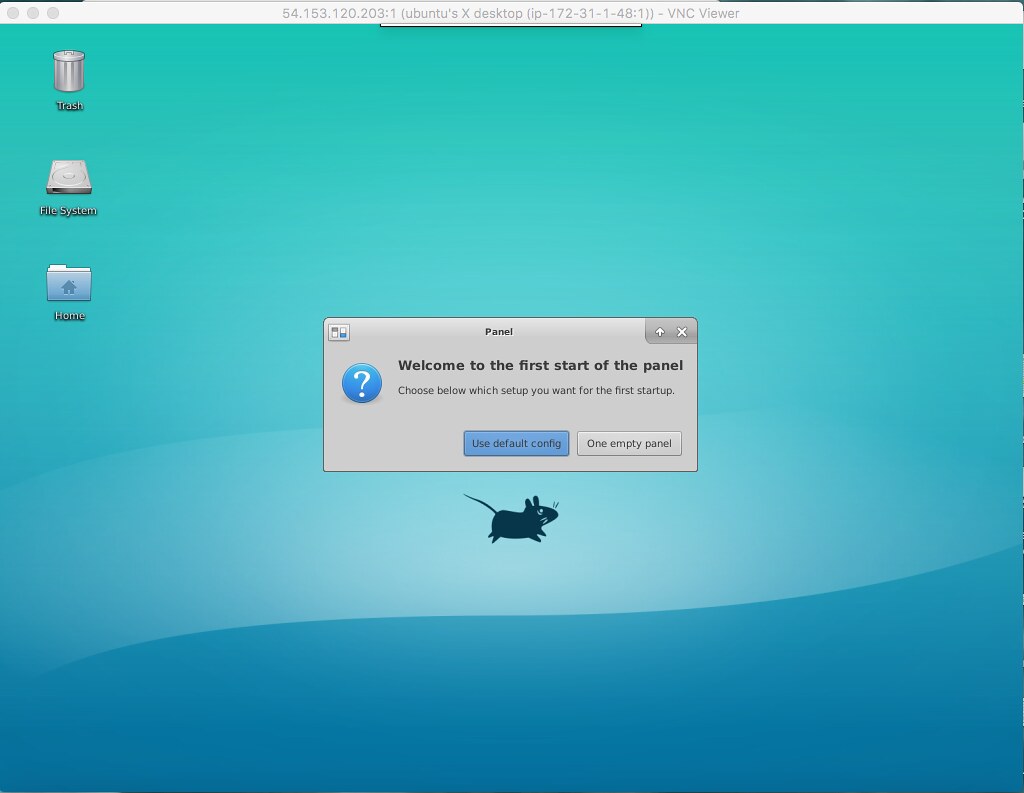
6. In the first popup, select "Use Default Config"
7. Click on the Browser icon (the globe with a cursor over it) and Firefox should open. You now have a working Linux VPS with a desktop! In the next section, we'll go over how to get Gunbot up and running, one of the easiest parts of this whole ordeal.
6. Getting Gunbot RunningDisclaimer: I'm a dinosaur and still using Gunbot v2.0.4, so that's what these steps will address. I'll add 3.2 when I move over in the next few weeks, but the setup steps should be largely the same.
Setting up Gunbot Version 3.2:1. Download the package from GitHub, along with any patches that were published afterwards.
2. Save the GUNBOT_v3.2_GUI_edition_all_CPU.zip to your computer. This version currently has no patches. If there are at a future date, download those as well.
3. Click on the downloads button, and select "Open Containing Folder" for the file (picture for 2.0.4 version, but steps are the same)
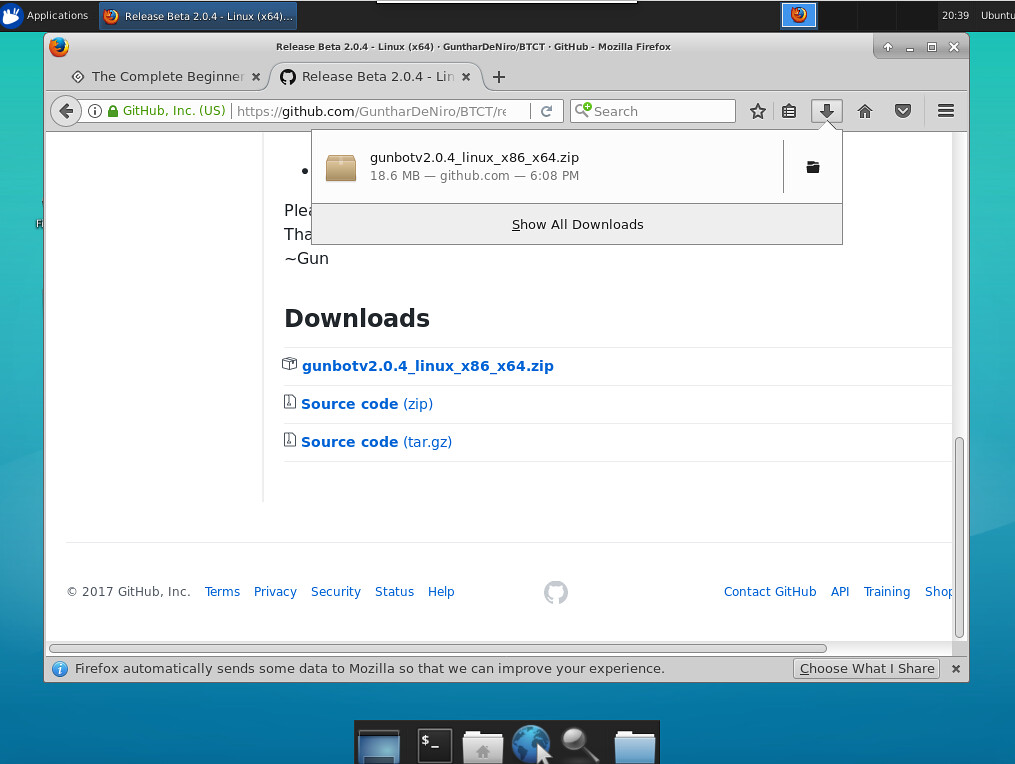
4. Right-click on the .zip and choose "Open with Xarchiver" (picture for 2.0.4 version, but steps are the same)

5. Click the "Extract Files" button
6. In the menu that pops up, click "Extract" as well (picture for 2.0.4 version, but steps are the same)
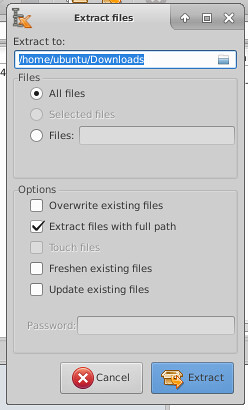
7. Now you should have an extracted "GUNBOT_v3.2_GUI_edition_all_CPU" folder (picture for 2.0.4 version, but steps are the same)

8. Only if there are patches: Extract the patch .zip and copy the files over to the GUNBOT_v3.2_GUI_edition_all_CPU folder. Replace any conflicting files. That's it!
9.
Setting up Gunbot Version 2.04:
1. Download the package from GitHub.
2. Save the gunbotv2.0.4_linux_x86_x64.zip to your computer.
3. Click on the downloads button, and select "Open Containing Folder" for the file

4. Right-click on the .zip and choose "Open with Xarchiver"

5. Click the "Extract Files" button
6. In the menu that pops up, click "Extract" as well

7. Now you should have an extracted "gunbotv2.0.4_linux_x86_x64" folder

8. Now it's time to open up our good old friend, the terminal. Click the terminal icon in the dock at the bottom.

9. Copy the path of the folder you extracted gunbot to by highlighting the address bar. In the terminal, cd to that directory.
In this example, that's:
cd /home/ubuntu/Downloads/gunbotv2.0.4_linux_x86_x64/
10. Next, we need to make the gunbot file executable. Do this by typing
chmod +x gunbot[/size]
All commands in terminal:

We're almost ready to start the pairs!
One last step before running your first test pair in Linux:Update the BTC_Dash-config.js file with your API keys.
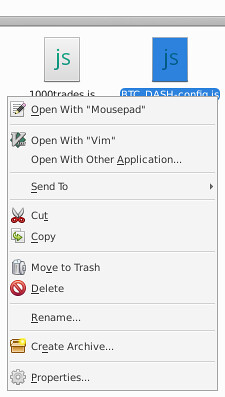
1. Right click on BTC_DASH-config.js and select "Open with Mousepad"
2. Paste in your API Key and API Secret in the two spots where it asks for it.
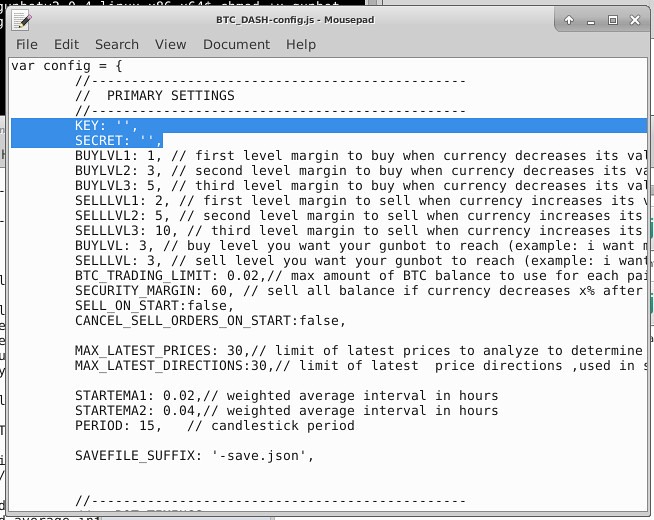
3. Save and closeRun it!In the terminal (the same window as before) type:
./gunbot BTC_DASHThis is what you should see for the result:
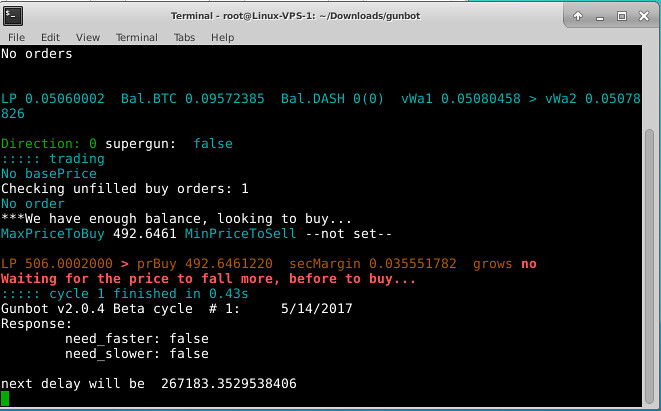
Now that you've run it, you're all setup and ready to rock.
Next, create config files for every pair you want to run Gunbot onHooray! If you've followed the directions up until this point, you should be up and running with Gunbot. But that's only starting one pair. What if you want to do it faster? We'll tackle that in the next section.
6. Easy start-all-pairs script and window tilingI've seen a lot of guides on how to view multiple gunbot sessions in Linux. They have all been, in my opinion, too complicated. I just want a bunch of windows open so I can watch my pairs go, I don't want to have to use new control keys to switch between windows. Here is my solution to that (much like running Gunbot headless in Windows)
First off, we'll need to write a script to run everything (or just copy mine)
1. In your terminal that should still be in the gunbot directory, type:
nano start_all_pairs.sh2. Paste in the following text, changing the pair names to the pairs you want to run. Leave everything else the same, unless you want to play with the sleep timers. This will open up htop (a resource watcher), all of your pairs in separate windows, and x-tile (a program to tile all your windows to fit on a single screen).
These pairs are not suggestions, they are simply the top 5 pairs by volume on Poloniex at the time of writing. You can copy these lines for as many pairs as you want to start.
Version 3.2:xfce4-terminal --title="Usage" -e htop
sleep 6
xfce4-terminal --title="BTC_ETH" -e "./gunthy-linuxx64 BTC_ETH poloniex"
sleep 6
xfce4-terminal --title="BTC_XRP" -e "./gunthy-linuxx64 BTC_XRP poloniex"
sleep 6
xfce4-terminal --title="BTC_LTC" -e "./gunthy-linuxx64 BTC_LTC poloniex"
sleep 6
xfce4-terminal --title="BTC_STR" -e "./gunthy-linuxx64 BTC_STR poloniex"
sleep 6
xfce4-terminal --title="BTC_EXP" -e "./gunthy-linuxx64 BTC_EXP poloniex"
sleep 6
x-tileVersion 2.0.4:xfce4-terminal --title="Usage" -e htop
sleep 14
xfce4-terminal --title="BTC_ETH" -e "./gunbot BTC_ETH"
sleep 14
xfce4-terminal --title="BTC_XRP" -e "./gunbot BTC_XRP"
sleep 14
xfce4-terminal --title="BTC_LTC" -e "./gunbot BTC_LTC"
sleep 14
xfce4-terminal --title="BTC_STR" -e "./gunbot BTC_STR"
sleep 14
xfce4-terminal --title="BTC_EXP" -e "./gunbot BTC_EXP"
sleep 14
x-tileThis is what you should see:

3. Press control + o, then enter to save, and control + x to exit.
Assuming start_all_pairs.sh has all the pairs you want, it's time to run it!1. Using the same terminal as you have been, type:
sh start_all_pairs.shIt should slowly start each of your pairs once ever 14 seconds.
After everything's up and running, it's time to get organizedNow you should have a bunch of disorganized gunbot windows up all over the place. This is where x-tile comes in, and it was the last thing your script ran. There should be a new box up that you haven't seen before, this is x-tile.
1. Select all of the windows you want tiled. I do all of my Gunbot windows only, I don't tile htop, for example. I want that to stay big.
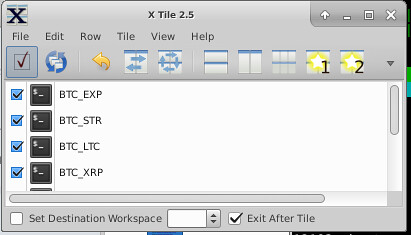
2. Click the "Grid Details" button (to the left of the #1 button with a yellow star) and select the layout you want. I'm running 20 pairs, so I'm going to have 4 rows and 5 columns.
 The final result!
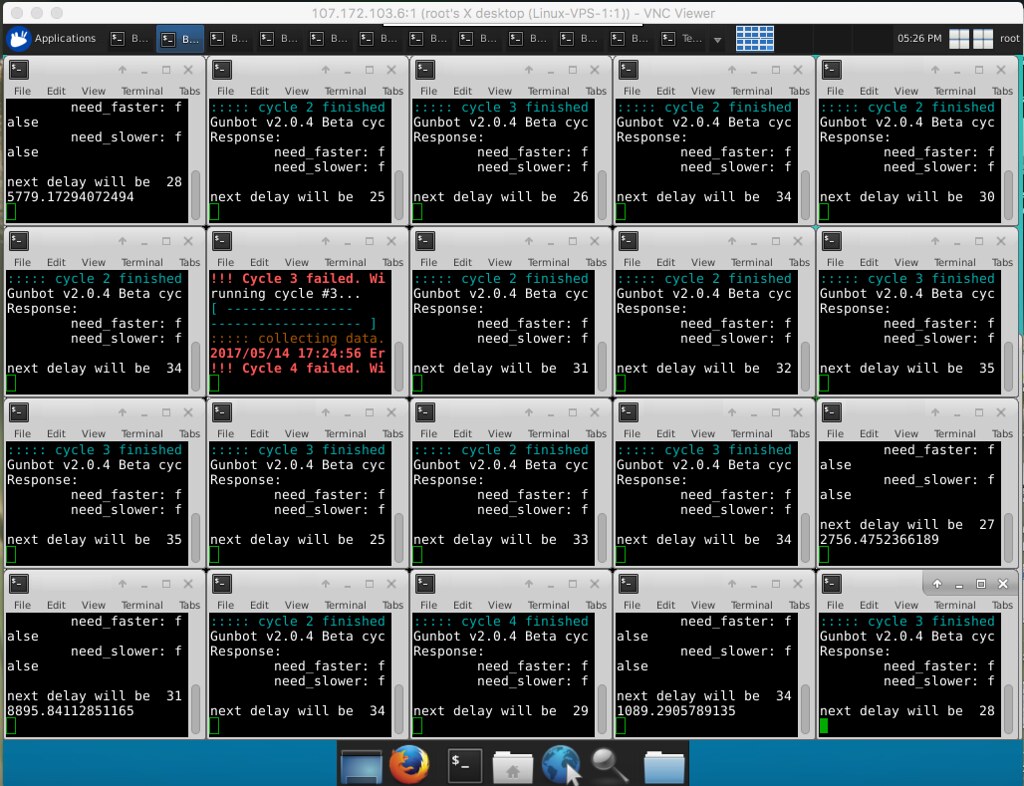
And there you have it, gunbot running on Linux, and you can watch all the pairs do their thing and monitor them for any issues.
FAQ1. What does it mean if I get a grey screen if I try to connect with my VNC Viewer?This means your ~/.vnc/xstartup file wasn't configured correctly. That file that tells VNC to launch up xfce4 (we installed this in Step 3) desktop when you first connect. If that's not setup right, VNC doesn't know what desktop to startup/view and you get a gray screen.
Head up to the middle of Step 4 to review what file should look like. If for some reason that doesn't fix it, check to make sure xfce4 is installed.
2. When I try to use my AWS .pem key to access the VPS, I get a "Permission Denied" error. What's wrong?You need to chmod 400 on your .pem key in order to get access. That's in Section 3, step 5.
To fix this, cd to whatever directory the .pem key is saved in and type:
cd to the directory your .pem is saved in and:
chmod 400 pem_filename.pem3. How do I know which IP address to use?Your VPS provider should've emailed you the IP address of your new server once it's all up and running. Be aware that this might change if/when you restart your machine; AWS is one provider that does this. The new IP can be found on the machine's management page when you're logged in to your VPS provider's website.
Let me know if you have any questions!
Tips!If you appreciate my work and would like to tip me, you can send coins to the following addresses. You are under no obligation to tip me, but they are appreciated.
BTC: 1MWejnvK2EWzsNViMi9PGYXaNT7HxzTzna
ETH: 0x50e9d068d4567d9d2f890ccc869996cf93201000
LTC: LhG2HPXVoPvaJHkxNSbFfLVGHqYXYH78JV
DASH: XxwVg988TF7dEv6pnfG7weLMatWxukE7CT
ETC: 0xb5a5132414a364391615874aa3ffdc3a74596b14Thanks to:Gunthar
J-Rod
Anon 509
Digital Ocean (Great VPS guide found here after much searching)